
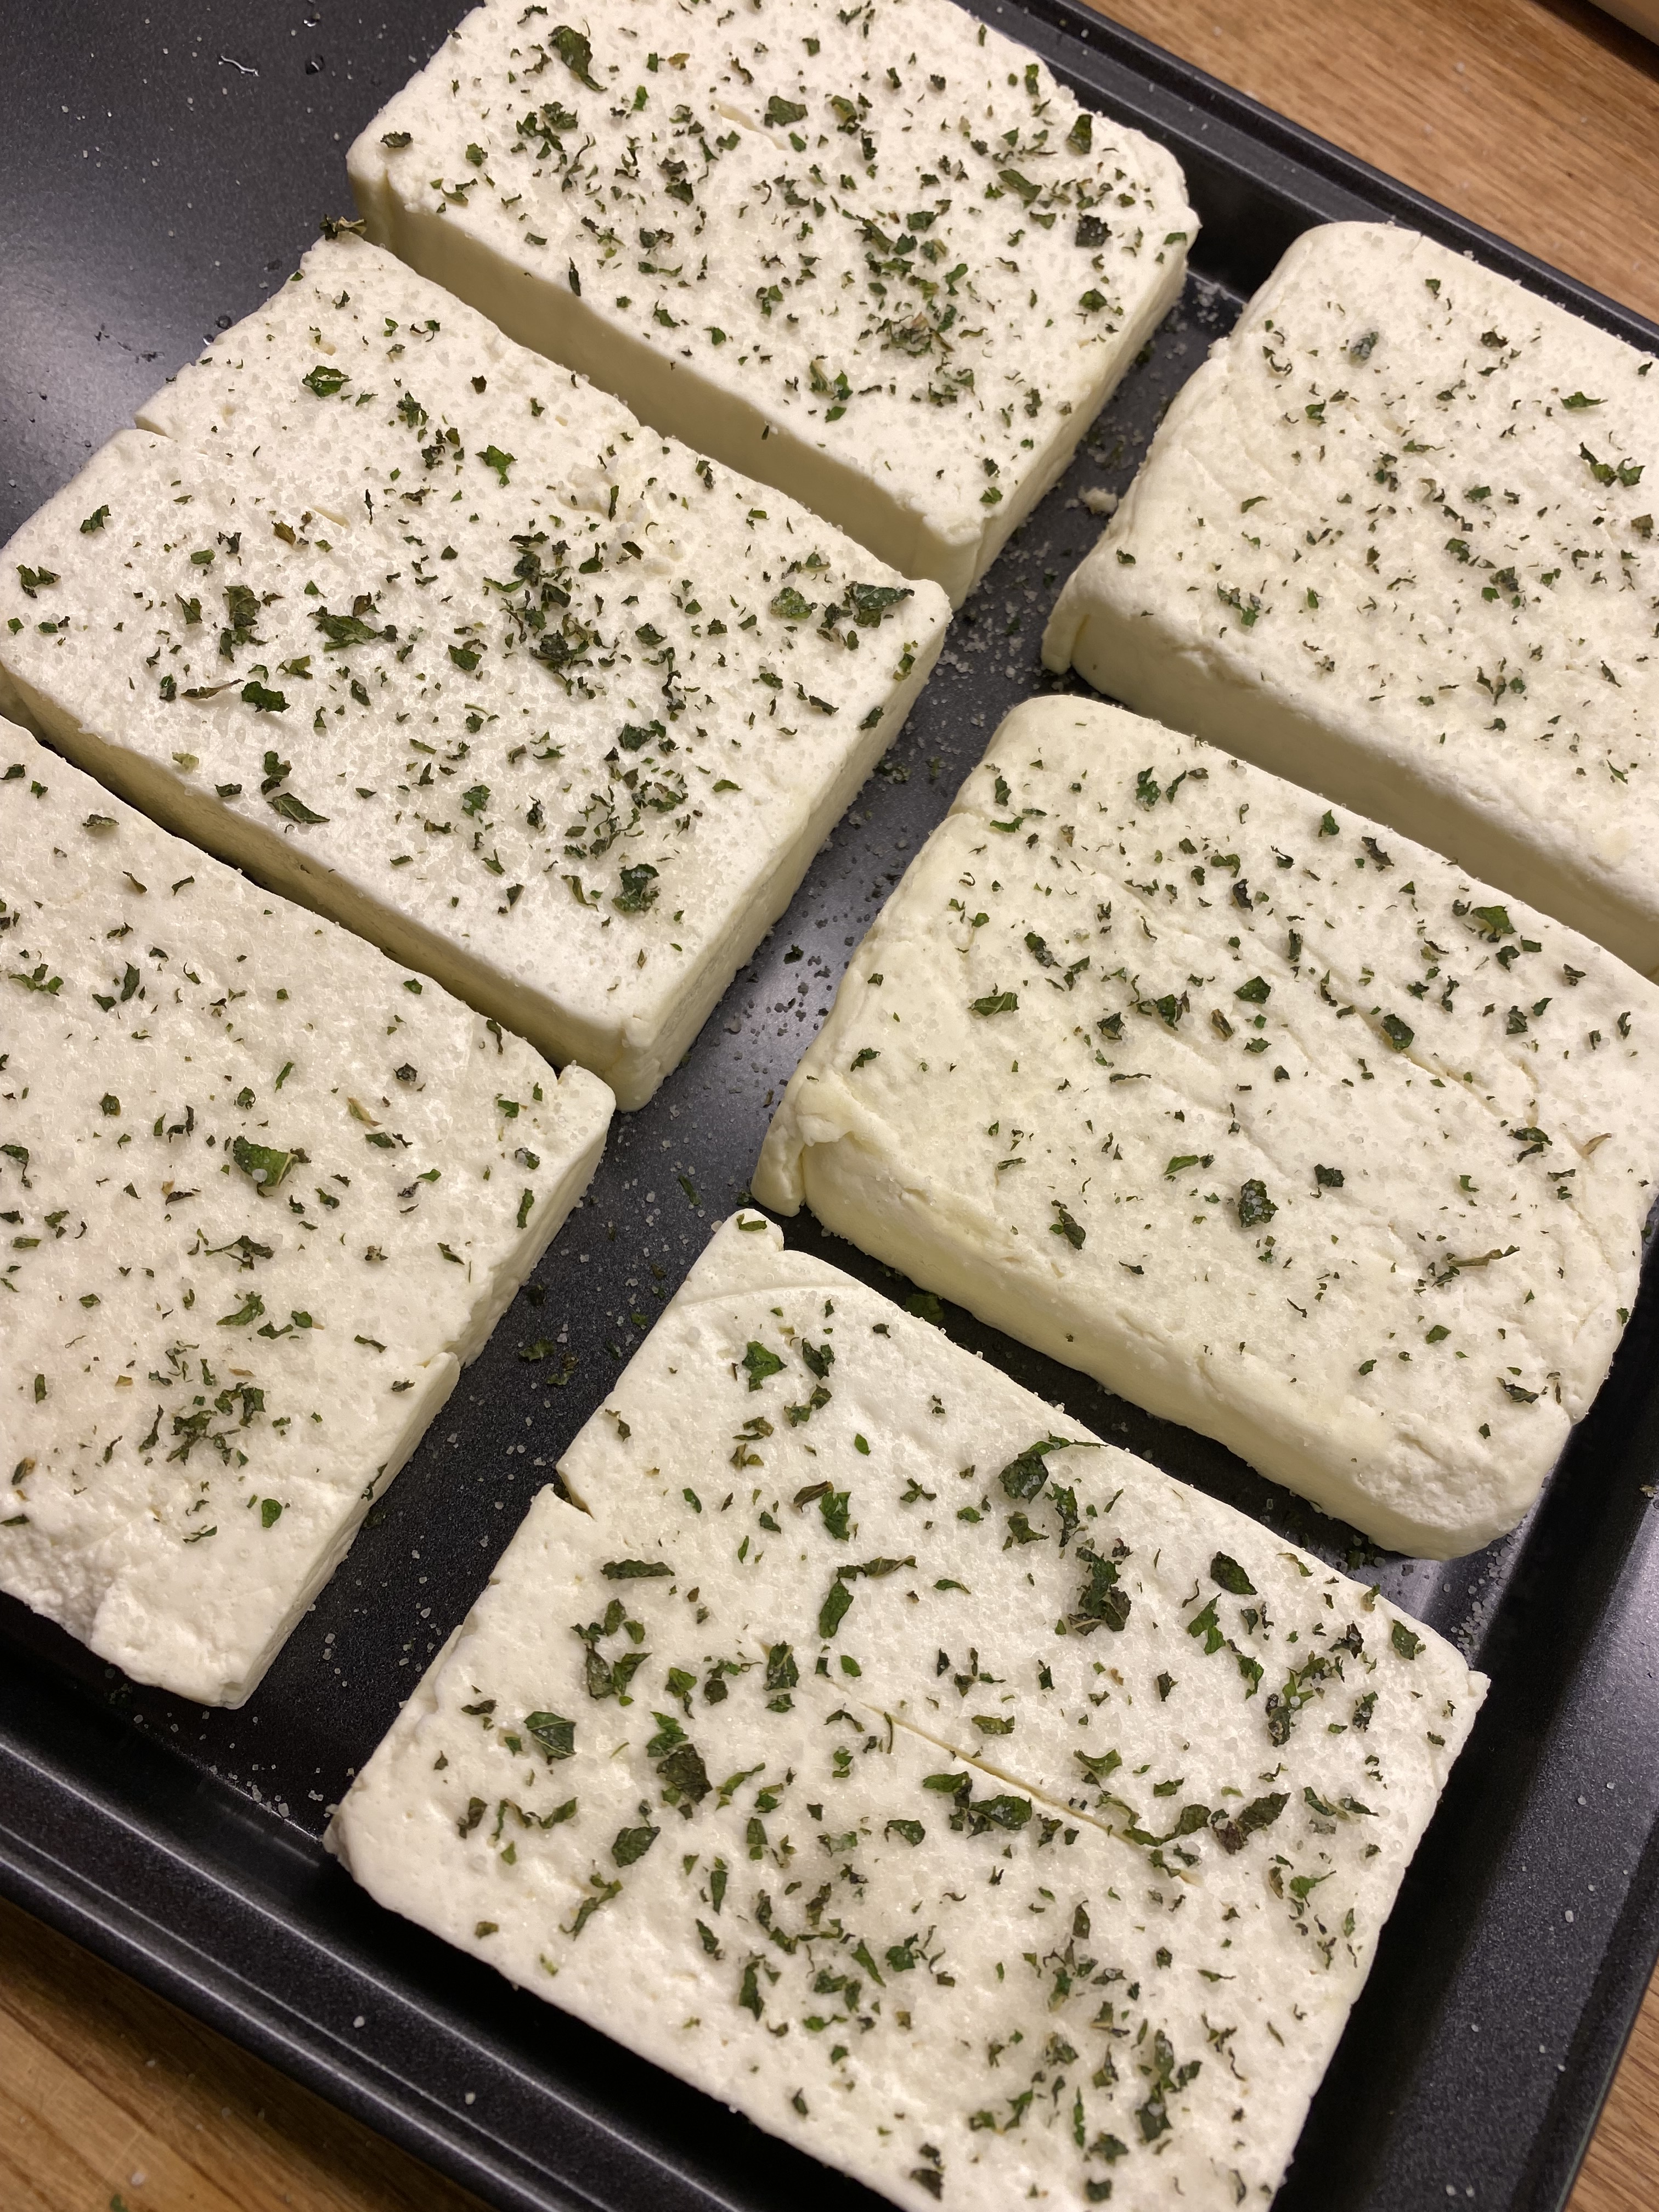
You may be wondering why you have not heard from me in such a long time (or you may not) and the answer is: Cheese! I’ve been making it and it takes time, especially if you are making butter and sausages as well. It’s all this churning, curdling, pressing and stuffing that gets into the way of writing your blogs. But as you can see, cheese makes you happy.

This is a Leicester that will be ready to eat in 4 months’ time. Below are the various Halloumi, Feta, Munster and Tomme I made in my short absence from the blog.


And it’s butter we should start with. Why make your own? Because you can! And then most butter here in Malaysia is either very commercial or very expensive, so I did a bit of research and found that I could culture the cream with cultures I ordered online and then would never need to order cultures again! “Why is that?” I hear you ask. It’s a bit of a long and convoluted story, but let me try and make it simple.
In the beginning there was a cow. Its rich, fresh milk would split into cream that would rise to the top and milk that settled under it. Both the milk and cream contained cultures that would turn the lactose in milk and cream into lactic acid and this acid would sour the milk and turn the cream naturally into crème fraîche or sour cream. That was nature. Then we came and made the milk safer for drinking by pasteurising it. Although that was better for mankind, it was not good for butter. The cream would no longer culture and the butter, though perfectly fine ended up without the richness of the lush green fields.

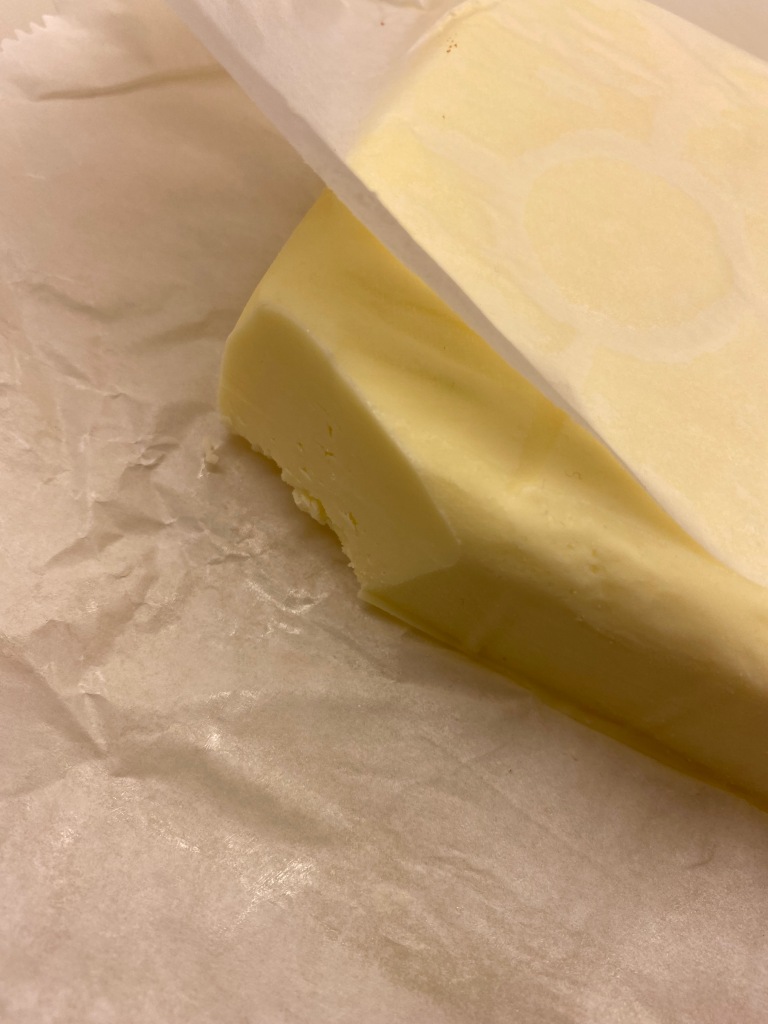
And that’s where the cultures come into play. By adding Mesophilic Aromatic culture to the cream, we reintroduce the lost bacteria and once the butter has been churned, the left over buttermilk (as well as the butter) will contain these cultures, so you can use them again to make more butter! You can even freeze the buttermilk and the bacteria will sleep until you wake it up again. It’s like magic!! The butter you have made out of cultured cream will not only age very well, it will develop a wonderful, deep flavour you simply cannot find in store-bought butter. And of course you can add whatever type of salt you like!
Cultured Butter, Crème Fraîche & Buttermilk
No, it’s not three different recipes. You get three for the price (and work) of one! You can decide whether to do a single recipe’s worth (I don’t recommend it, because the work does NOT double with the quantity and neither does the washing up) or do three in one go. Three is as much as my Kitchenaid will take, so that’s normally as big as I go.
- 1 litre cream
- 1/16 tsp Mesophilic Aroma Type B cultures or 50ml buttermilk
- (1.8% of the weight of the butter in salt if you are salting your butter)
Crème Fraîche and Buttermilk are by-products of butter making, so we don’t need to worry about them, they just happen. There are 5 stages to making butter:
- Culturing the cream
- Churning the butter (whisking, in our case)
- Squeezing out the buttermilk
- Washing the butter
- Shaping the butter
Culturing the Butter
Culturing the butter will sour it and set it to the texture of soft tofu. This adds a great flavour to the butter. There are two ways to do this, either with a store (or online) bought culture, or by adding 5% of the volume of cream in buttermilk. So for each litre of cream, you add 50ml buttermilk. But you have to make sure your buttermilk contains live cultures. I’m not quite sure how you test that, short of just trying it out. If the buttermilk has been pasteurised, or heated to more than 38ºC, the cultures will be dead and your cream won’t sour.


If you are using culture, you will need one for buttermilk, which is basically a Mesophilic Aroma Type B. Start by heating the cream gently to 30ºC, sprinkling the culture on top and leaving it to hydrate for 5 minutes, then stirring it in thoroughly. And that’s it! Pour the cream into a jar or tub that will just hold it, close the lid and leave it at room temperature, between 20ºC and 30ºC for 24 hours. This is not going to ferment (unless you did something wrong) so there is no danger of the jars exploding.

If you are using buttermilk, just add the buttermilk to the cream and heat both up together. If your buttermilk is frozen, put the frozen buttermilk into the cream and wait for it to dissolve before heating the cream. The proceed as above.
After 24 hours at room temperature, your cream has turned into crème fraîche and can scoop off as much as you like. I actually prefer to pour some of the heated cream mix into a dedicated container and leave that out together with the cream for the butter. Then after 24 hours, I can just chuck the container into the chiller and my crème fraîche will be happy for a week or two.

You could make butter straight away, but I like to mature my crème fraîche for a few days. If you have a wine chiller, transfer your cream for butter making into the wine chiller and leave it there for 48 hours. If you don’t, put the cream into the vegetable drawer of your chiller and leave it there for 3-4 days.
Churning the Butter
Once all of that has been done and the cream has turned into something greater, pour it into the bowl of your stand mixer. I say pour, but if it’s matured nicely, you should be able to turn it upside down without it falling out. Loosen the bottom with a spoon and the whole mass should plop out easily. Attach the whisk and whisk the cream at the second highest setting. My Kitchenaid stand mixer will take three litres of cream at most, so check the capacity of your mixer before you start on a ten litre batch. Watch the cream carefully and you’ll see that it’s becoming fluffier at first, then it starts to look a little lumpy and over-whisked, which is about the time you want to bring the speed down a notch.
Now, you can just let the thing be whisked at top speed and get butter but reducing the speed throughout the process will extract more buttermilk right from the start and make your life a lot easier when it’s time to wash the butter. So lower the speed gradually, so that when the first bits of liquid buttermilk appear, you can switch to the lowest setting.


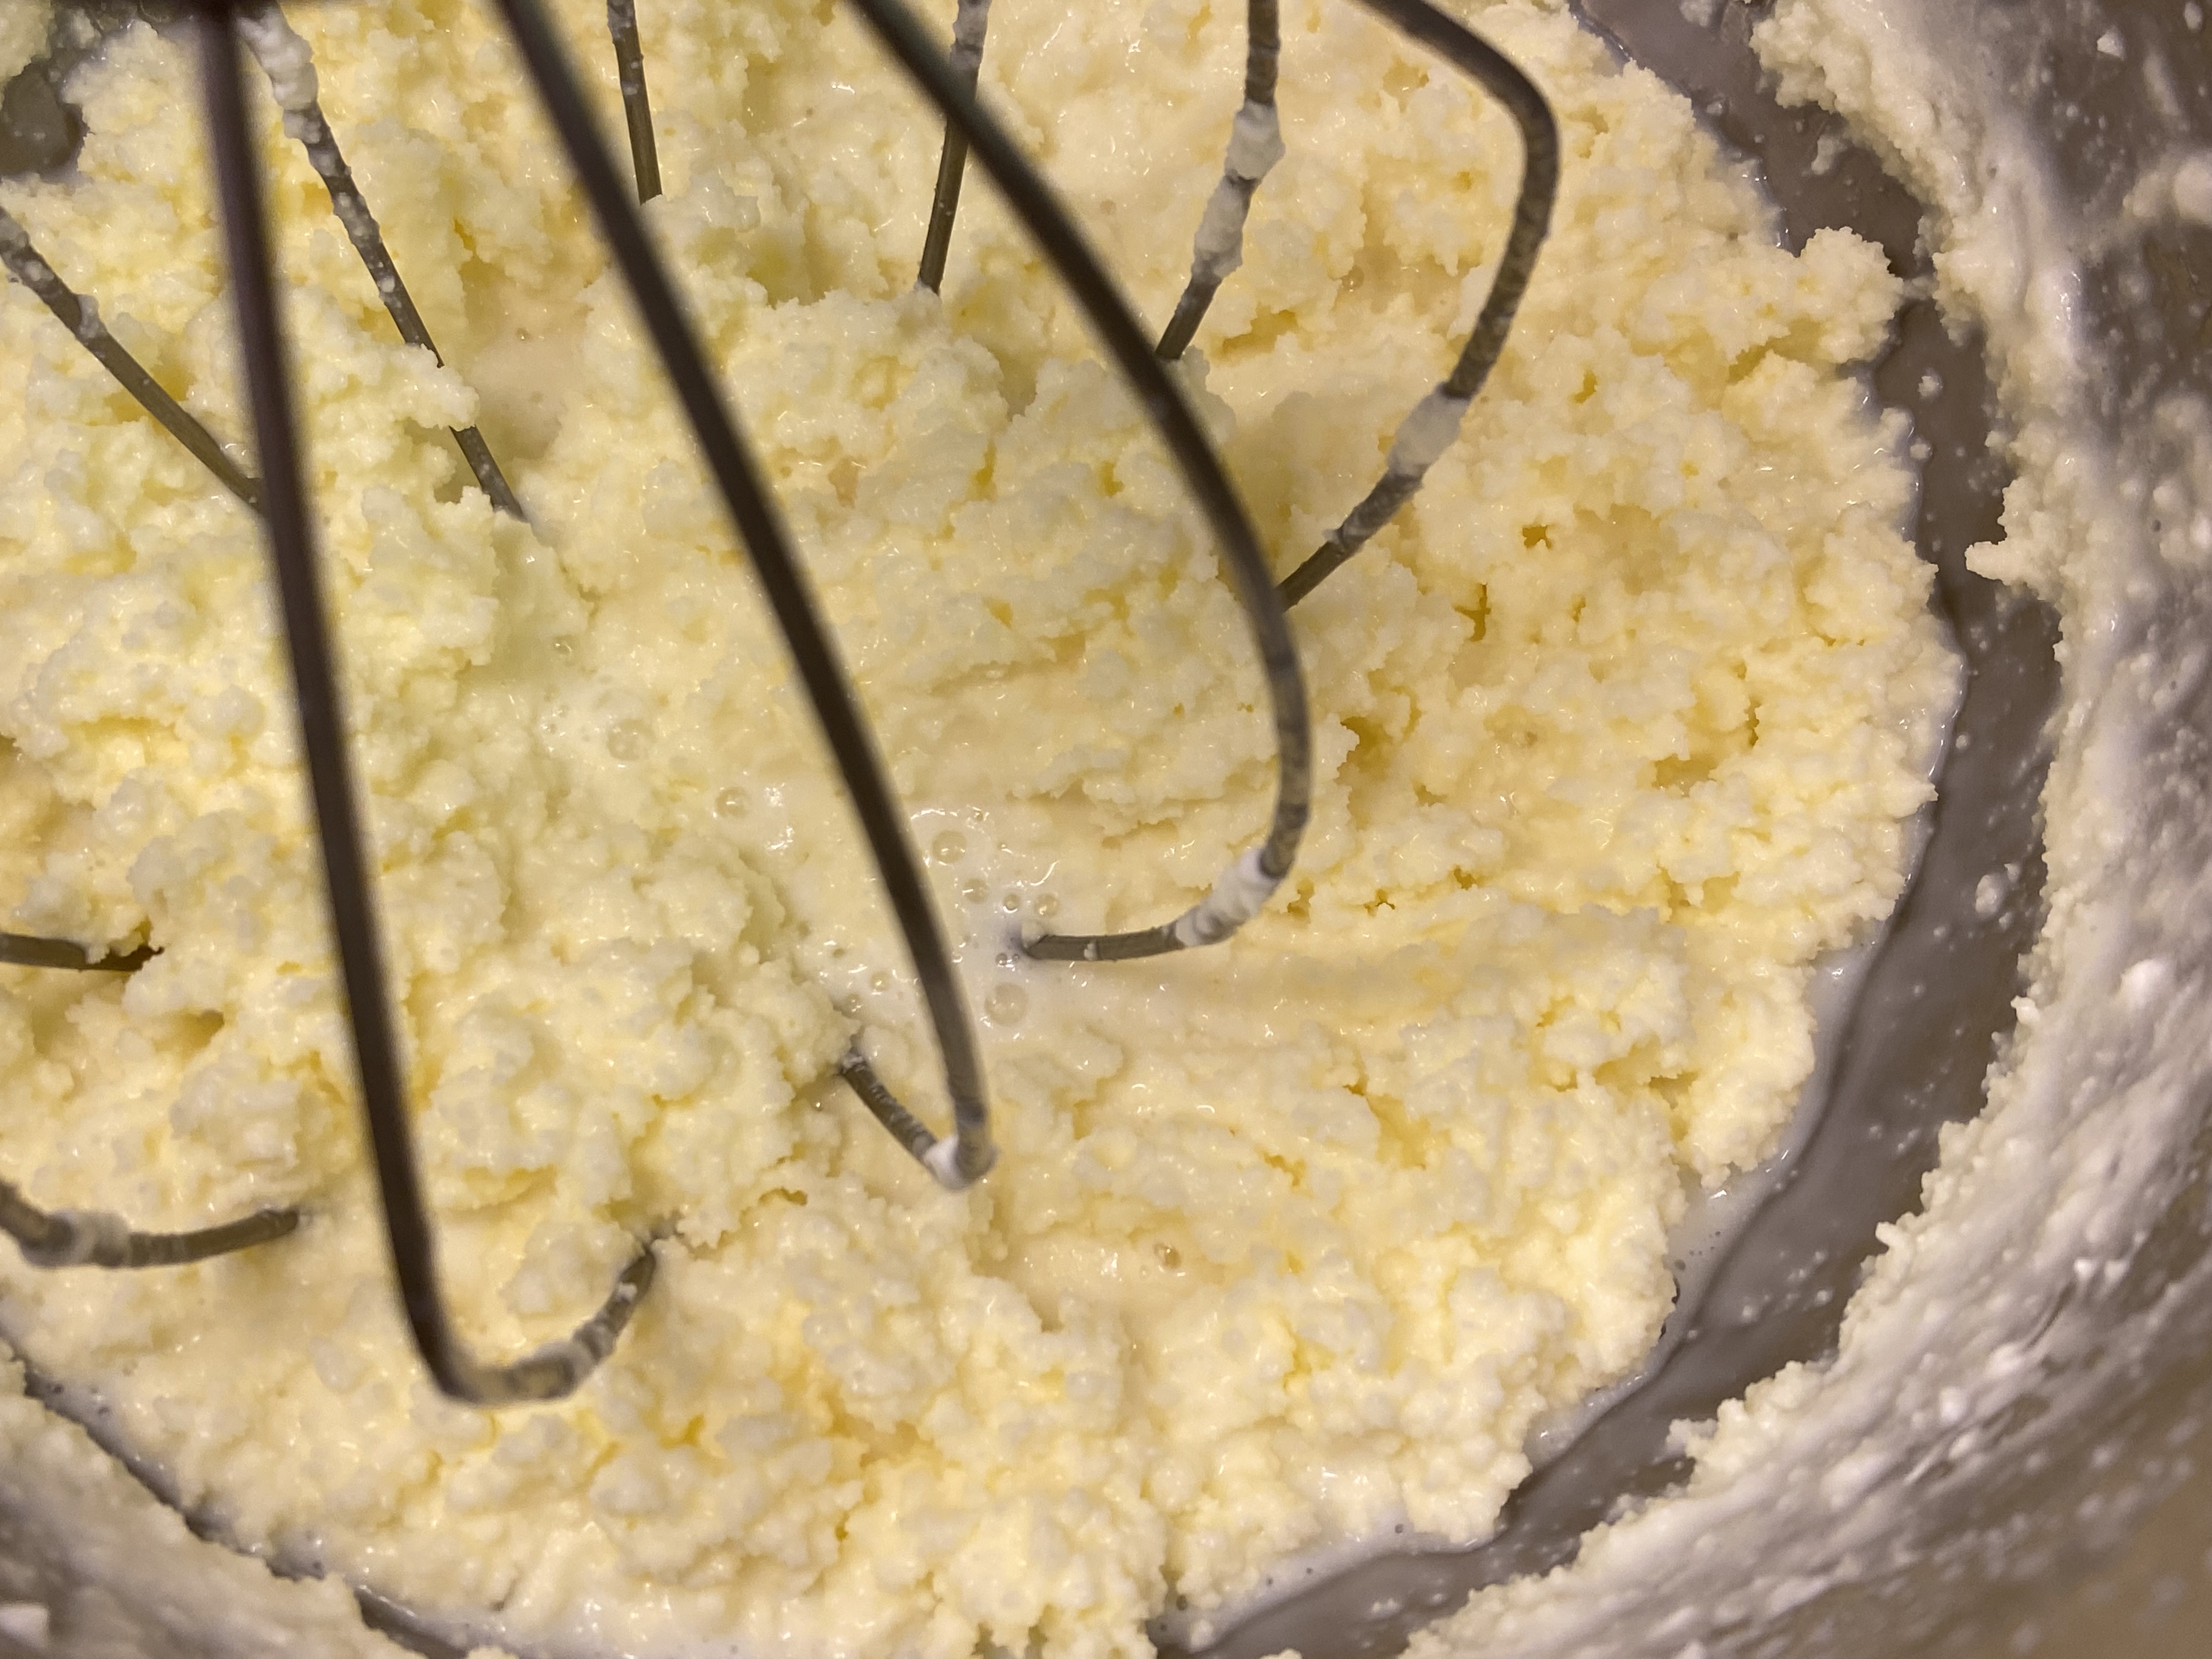
You will soon see the first specks of butter appear. Make sure you’re at the lowest speed, but do NOT turn the mixer off at this point. Keep churning your butter until it has formed clumps around the whisk and the buttermilk is sloshing around in the bowl. Now turn the machine off and do NOT turn it on again unless you fancy mopping up the buttermilk that will have been ejected from the bowl all over your kitchen counter.
Squeezing out the Buttermilk
Now you have butter floating in a sea of buttermilk and all you need to do is get all the buttermilk out of the butter. Take a bowl (preferably chilled) and put your newly crafted butter into it. Tilt the bowl and squeeze the butter against the side and you will see a lot of buttermilk coming out. Pour this back into the bowl of the mixer that holds the rest of the buttermilk and you’re ready to wash the butter.


Washing the Butter
Prepare a large bowl with lightly iced water. You need this to be cold, but not so cold that your hands suffer frostbite. I like this part, so I make my water agreeable chilly and washing the butter will be a joy. Drop the whole ball of butter into the iced water. Start kneading the ball of butter. I like to just squeeze the butter between my fingers. The water will become milk as you knead.


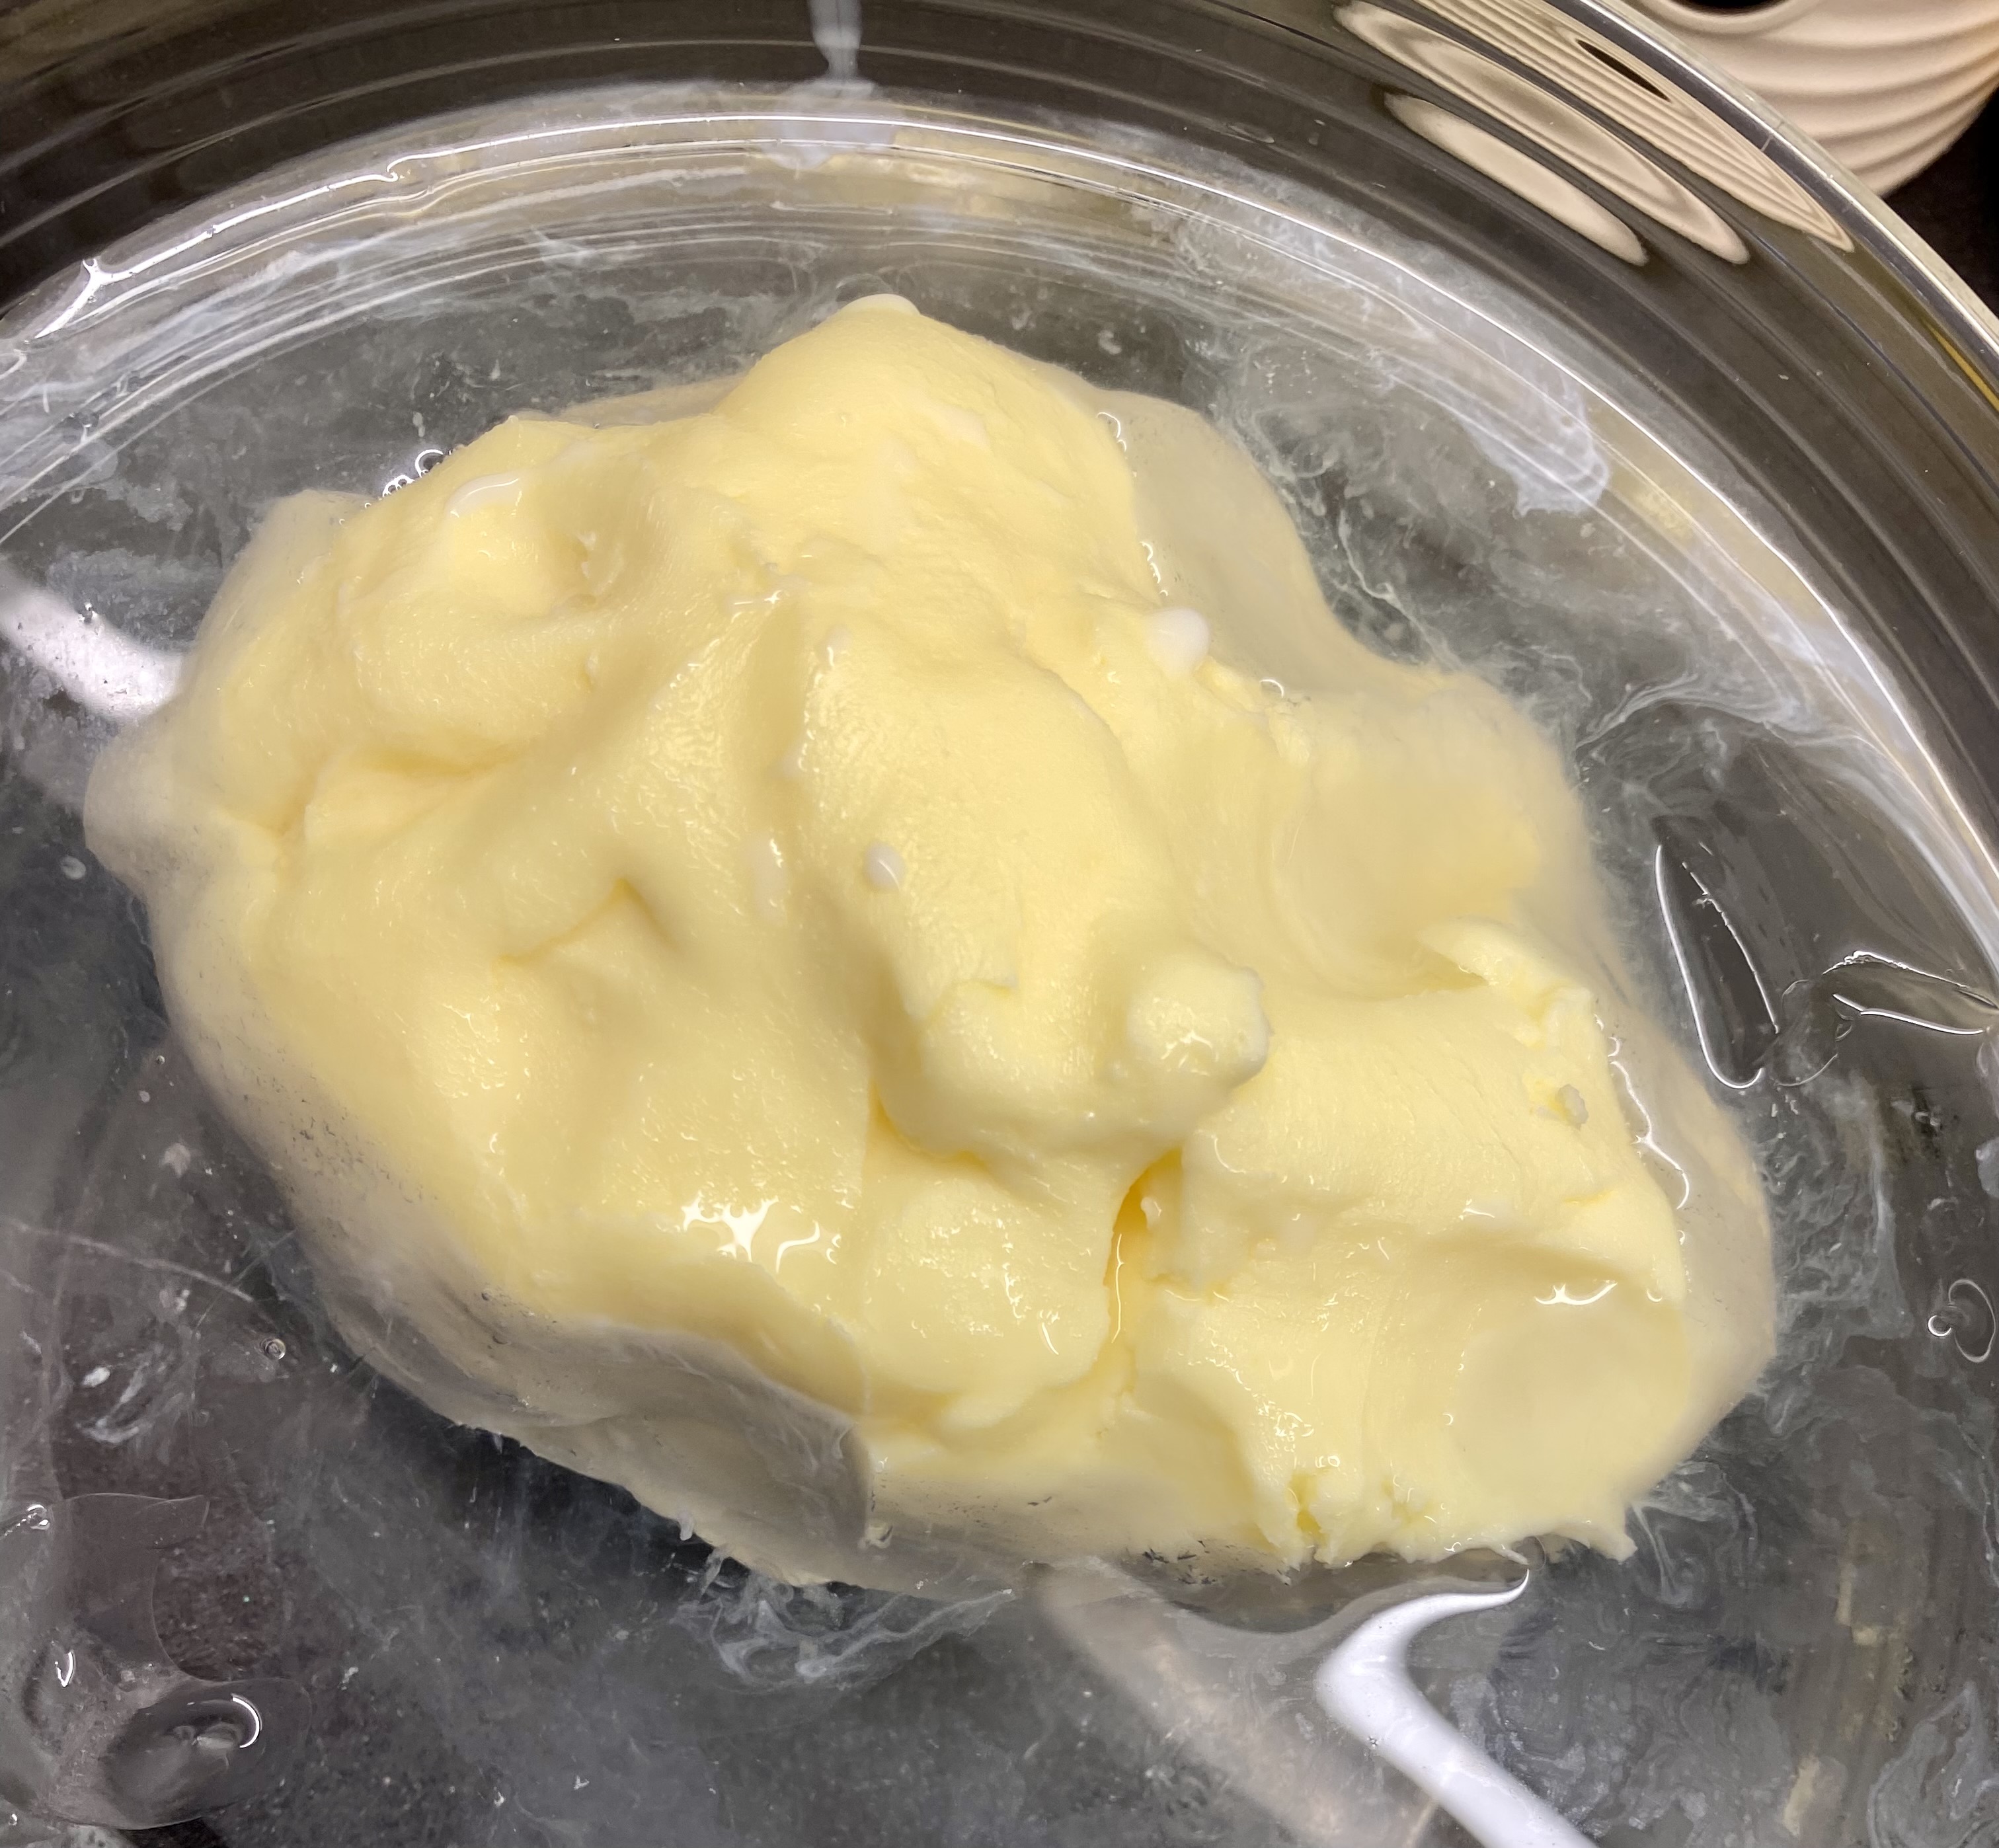
Keep doing this for at least five minutes and you will notice the texture change very subtly. This is extremely important. If you knead it well, you butter will be smooth and wonderful, if you don’t, it will be crumbly and not quite so wonderful, so err on the side of caution and squeeze that baby!
If you are a dab hand at butter making, you will not need to change the water, but if you are new at it, you may want to prepare a second bowl of iced water and move the butter into it after kneading. Squeeze it a few more times and if your water remains clear, you’re obviously in the clear. If you are not salting your butter, shape it any way you like, wrap it in parchment paper or cling film and drop it into the chiller.

Salting the Butter
If you are salting either all or part of the butter, weight the washed butter and add 1.8% of its weight in salt. So that’s 1.8g salt per 100g butter. This will feel like a tiny amount of salt but resist the urge to add more. Make sure to massage the salt well into the butter, so it is evenly distributed. If you are going to the trouble to salt your butter, you should really use some nice salt to do it with. Try coarse sea salt, or Maldon smoked salt flakes.

Shaping the Butter:
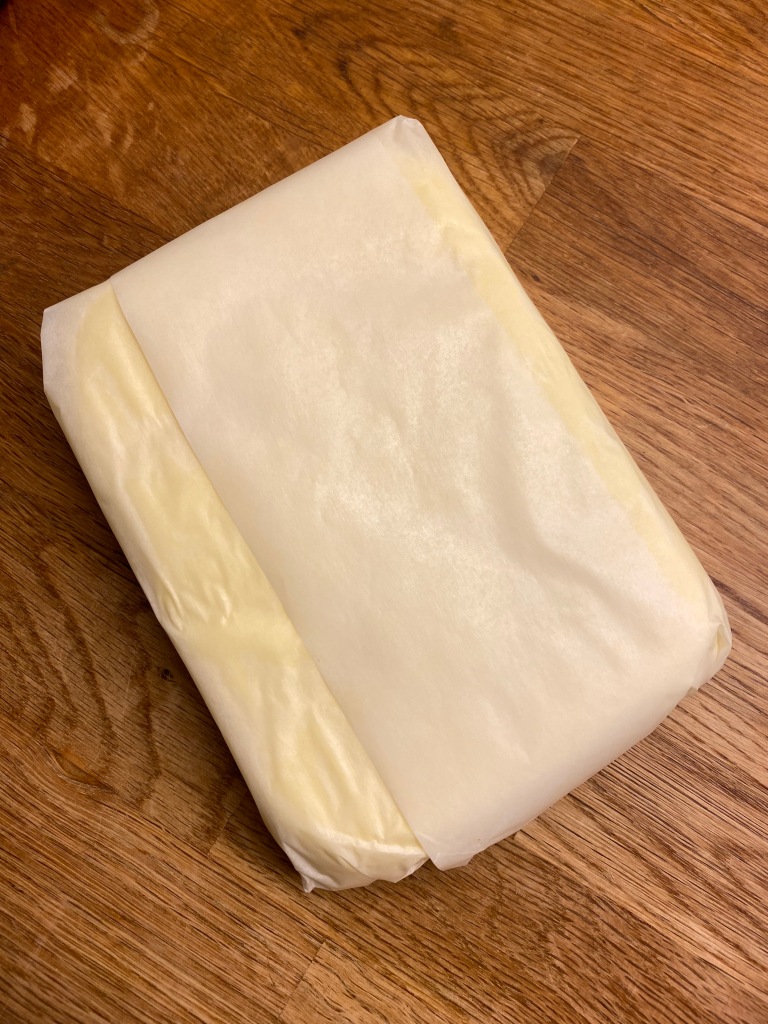
You can shape your butter by just rolling it into a cylinder, using either parchment paper or clingfilm. I find that using surgical gauze, which you can pick up by the roll from most pharmacies makes the shaping much easier. So first wrap the ball of butter in gauze, then squeeze it into the shape you want.
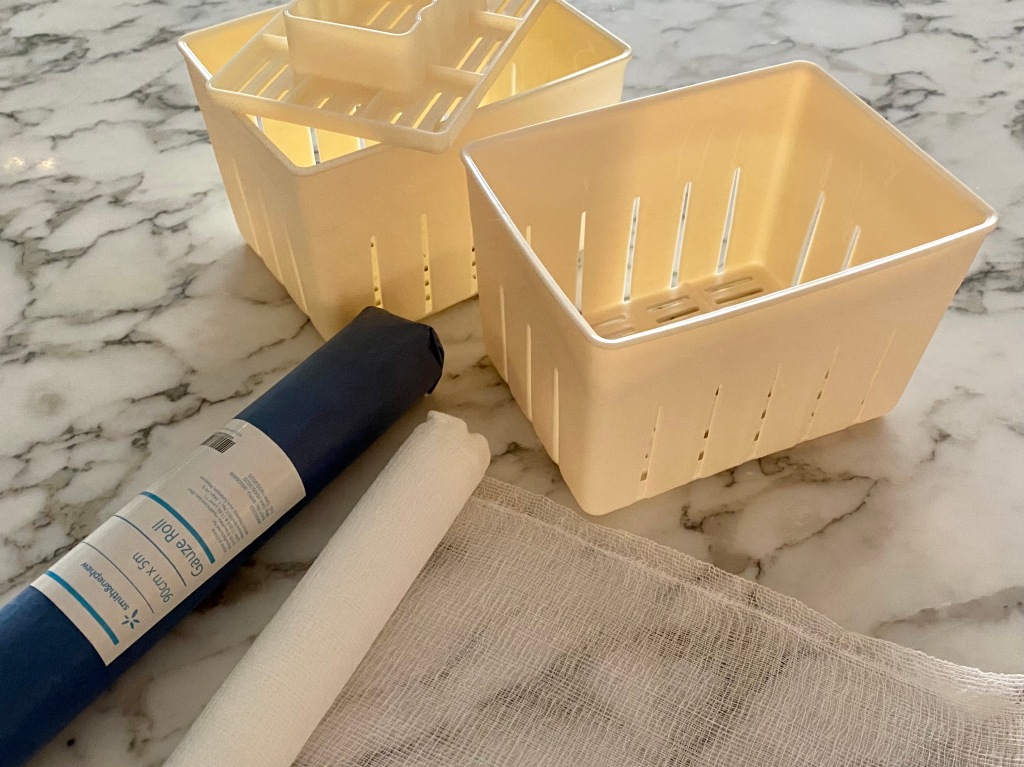
I actually use tofu moulds I got online to mould my butter. I first line them with surgical gauze, then drop the butter into it, push it into the corners as best as I can, cover it with more gauze and then use the follower provided with the mould to press it into shape. I then put the whole tofu basket into the chiller for an hour or two to firm the butter up.


Next, I pull it out of the mould, which requires a little brute force, so make sure there is enough gauze to hold on to and pull. I have parchment paper in two colours, so I can easily tell the salted butter from the unsalted without having to peer at a label that’s illegible to my unbespectacled old eyes. Remove the gauze and check for rogue threads on your butter and it will stick nicely to the baking parchment without the grease coming through.
Enjoying the Butter:
Your homemade butter will get better after a few days in the chiller, so take your time to enjoy it. It will easily last a month or more, if it’s stored in a properly cold chiller (that’s one set to 2ºC). Any extra blocks can be either vacuum packed in its wrapper, if you have a vacuum machine, or just put into a freezer bag to prevent other it acquiring a freezer smell. It will then last for a year or more.


Words of Advice:
You are dealing with live cultures here, so hygiene is very important. Wash your hands thoroughly before you start making butter, wash all your containers with a good amount of soap and use clean towels throughout. Surgical gauze does not need to be washed, as long as you keep it wrapped after opening the package. You do not want pink mold to appear on your butter. You don’t need to go crazy sterilising everything, just keep it all freshly washed and your butter will be fresh for a long while.
Not all creams are created equal! Look for a cream that does not have emulsifiers in it, otherwise your cream might not split at all. Stabiliser (that’s E407) is usually fine, but emulsifiers have the nasty habit of bringing your cream back together again just at the moment it was about to turn to butter. So if your butter won’t churn; it’s not you, it’s your cream!

Wow Christian amazing! Looking forward to catch up and I want to try your cheese 🙂
Joerg
Sent from my iPhone
LikeLike